There were a few milestones during the kitchen renovation project that helped me establish a completion timeframe in my mind. I like to know the parameters for when I can expect things to occur. Probably the minor control freak in me! 🙂 Which in this case was very unrealistic to even try. The installed countertops meant there was hope for completion of the kitchen on the horizon in the near future.
However, I had felt that way each time a step in the process was finished. So my expectation for swift completion at this point was subdued. With the thoughts of past completions that led to more work, I knew better than to get excited. In perspective, we were closer than when we started but we still had the little details to finish up.
At this point, the things that were left to do in the kitchen were more detailed items. The trim, casing, crown molding, backsplash, cabinet doors, cabinet pulls, and the like. I really could not wait to be out of the makeshift kitchen in the formal dining room and actually in a real kitchen.
Related: First Complete Kitchen Renovation – Part 1


AS A PARTICIPANT IN THE AMAZON ASSOCIATES PROGRAM, AN AFFILIATED MARKETING PROGRAM, I MAKE COMMISSIONS ON PURCHASES MADE THROUGH THE FOLLOWING LINKS.

With the counters installed minus the added need for repairs, it felt like we had smooth sailing ahead in our kitchen renovation!
The seven months this project took to get to a place where we could actually “use” the kitchen felt like an eternity. Well worth the wait but still. In the scheme of things I know I am very blessed that this was even an option and that I have the things I do. It was just the culmination of all of the unseen things unraveling at the same time that made the whole experience that much more stressful and arduous.
The process seemed never-ending and ever-going. I think to understand what it is truly like living through a DIY kitchen remodel you have to realize the timeline is never actually defined as it ever-changes and always unexpected.
A sink and a dishwasher are so undervalued in a kitchen. Their value is overwhelmingly apparent when you are washing dishes in a utility sink in the laundry room.
Since the sink was finally installed with the countertops we were able to finally run the water lines. This meant we could connect the dishwasher and install it in place. I went to Home Depot the minute Kevin said it was time to install the kitchen faucet. I did my usual online searching for who had what at what price but settled upon one from Home Depot. It was the look I wanted and in the right price range.
The faucet was easy to install and was the sleek farmhouse addition I wanted. I will say that you do get what you pay for. Not that it was cheap by any means but there was some leaking at the sprayer pull. Along with some of the other things in the kitchen, it will do for now!
Related: New Kitchen Appliances


I don’t think I could live without a dishwasher! I know that sounds ridiculous because it’s not a necessity but really it does make life easier. Especially when you have two little boys which is quite the collection of dishes in a day. I decided this time I wanted to get the Samsung dishwasher model with the silverware tray on the top.
The extra tray up top is amazing and I absolutely love it. The ability to have the silverware on its tray up top gives more room in the bottom basket! Kevin likes to say if there was an Olympic event in dishwasher “stuffing” I would win. I have to take the compliments where I can get them I suppose!
Next onto the new kitchen pendant light over the sink!
As with all the other steps in the never-ending kitchen project, the kitchen pendant light that I had ordered from Lowe’s was delayed. Which really wasn’t a big deal because it is more of a decorative aspect of the kitchen. Yes, it gives light but we had already put the recessed lights back in so I didn’t “need” the extra light at the time. When it finally did arrive Kevin installed it over the sink. At some point, I think I will replace the glass that it came with. I want something like the glass we had on our pendant light over our old sink.
Related: New Kitchen & Dining Room Light Fixtures


A hiccup in the process which is par for the course at this point.
As Kevin was finishing up the new flooring in the breakfast nook that is attached to the kitchen he realized he would have to tear out the flooring in the passway between the kitchen and living room. We knew that this would need to be done but we put it off initially so that we could access the storage behind the stairs. Since we needed a place to store food and kitchen stuff during the demolition.
So again we had to tape off the area and Kevin went to work with his hammer drill. Dust, dust, dust, and more dust are all that I saw! It seemed worse than the kitchen which is probably just an illusion but there was a mess. I think that since we had moved past the dust part having to revisit it made it more pronounced, at least for me! Once that flooring was removed and replaced we were finally able to bring the fridge back into the kitchen. As well as the kitchen table was then back in the breakfast nook.


The minute details at times butter my biscuit. I live more in the notion that let’s get it functional and then finish the little details. The trim, shoe, door casing, and such are things in my mind that can wait! That’s why I suppose I’m not in charge of the “plan of action”.
All of the white trim does look nice against the bluish-gray wall color and the white cabinets. Eventually, yet again, we will frame out the five windows in the breakfast nook. For now, they are naked! I was just super excited that my things were finally making their way into the kitchen!


Related: Hello New Kitchen Wall Color
Next on the detail list – The Backsplash
When it came to deciding on a backsplash the only thing we had really decided on was that we wanted it to be white or at least something light. Kevin was more on the side of a subway tile look and I wanted something a little bit more unique. He always says I like to make things difficult. Especially since I don’t actually have to figure out how to get these unique shapes to work in the space on the wall.
We went to Lowe’s to look at backsplashes and actually decided on a white lantern pattern. I was kind of leaning toward the gray version of the lantern pattern we picked. But ultimately we compromised on the white. He got the color he wanted and I got the pattern I wanted!
Sometimes Compromise Brings the Best Outcome
Well, I was glad we did go with the white lantern tiles. Kevin accidentally bought one of the gray in a mix of white lantern tiles. After holding it up to compare the white really did work better with the colors we had in the kitchen. The white kept the bright feel in the kitchen we were going for.


Kevin decided he would do the backsplash in two parts. He started on the easier side first. Since he was going to be out of town for a couple of days, he wanted to complete at least the side he started and not have to leave in the middle of it!
Once the tiles were laid out and accounted for it seemed like the first side was quite easy to install. With the mortar smeared the pattern came together without the need of a ton of cuts. Minus the tops and bottoms of course. But nothing like the other side of the kitchen, *cough, cough* that I wanted to have taken out! 🙂
One Side DoneTime To Grout
Since this was not our first tile job we knew we wanted to get a pre-mixed grout. The grout on our first bathroom remodel turned yellow very quickly. We learned the hard way that when you mix your own grout you need to use distilled water. Also when you have hard water having white grout in the shower makes it extremely hard to keep it white, at least in our opinion. We ended up painting the grout in our old bathroom a gray color. Just to cover up the yellowing white.
Since this tile was on the backsplash of the kitchen wall we were more confident using a white grout. It wasn’t going to come into contact with water like our shower did. As well as the fact that we used pre-mixed grout this time. It really turned out nice and I will keep my fingers crossed that we have no issues!
Related: Our Full DIY Bathroom Remodel Project


Finishing up the kitchen backsplash!
Once Kevin got back into town he started working on the rest of the backsplash. At this point having to move and function in small areas had become the norm. I had to haul everything to the already tiled side of the kitchen. This side seemed to be so much faster of a process which really shouldn’t have been the case. Since there were more angles to this side. It probably went smoother since he had the hang of cutting the tiles and lining everything up!

The kitchen was finally looking like a “real” kitchen!
To say that I could not wait to be able to install all of the kitchen cabinet doors is an understatement. I know that some people are into the open shelf look in the kitchen. I think I just have to much junk for that. That or I am just not that together to have things look just so on a day to day basis. Either way I could not wait to have my cabinets covered up!
I introduced the thought of getting our door pulls before we installed the cabinet doors. My thought was two birds one stone. We would have to take the cabinet doors off to install the door pulls anyway. So why not just install them before putting them on. Though Kevin was initially against my idea as he worked through adding all the doors I think he appreciated the rational. There are plenty of times that my minute detail essentials don’t aline with Kevins plan of action.
We ended up buying the door pulls from Lowes. Initially I thought I wanted cupped pulls on all the pullout cabinets but decided against it. They were way to big for the faces of our cabinets. I settled on nobs for all of the upper cabinets and handles for the bottom cabinets all in a black finish.


There are lessons learned along the way of our entire kitchen remodel project.
After installing the cabinet over the refridergator we realized that the cabinet was way to short. We knew through this process that there would be things we learn, or screwed up. I will say that I am surprised that we didn’t screw up more things than we did. We had to order a new cabinet that was taller so there wasn’t just an obvious gap.
I of course told Kevin to just add a panel of white wood there. Because in the back of my mind I knew a new cabinet meant more time. He wouldn’t even listen to this suggestion let alone humor it. Which I get because it was my impatience. He had come this far and he wasn’t going to just slap it together to be done.


The corner cabinet reminded us that angles really do matter.
Another issue, miscalculation, whatever you want to define it as, we ran into was the upper corner cabinet door. After trying to install the cabinet door we realized that because of the angle, we wouldn’t be able to have a door on this cabinet.
The more I thought about this minor inconvenience, the more excited I became. The shelves were currently being used to store things. I could see how leaving them open might actually work.

Yes, I wanted an open shelve! I complained about all the cabinets not having doors and here I was excited about the thought of a corner of open shelving. Though the excitement quickly turned to realization that this meant another “project” within the scope of the whole kitchen project. This project has definitely taught me the premise of all things in good time. So began the caulking, priming, sanding, painting, sanding, painting, and sealing of the corner cabinet.

All of the final touches, finally!
With the mishaps taken care of and the door pulls on and cabinet doors installed it was time for the last finishing touches. Adding crown molding and all of the trim and casing. Kevin added a piece of wood to the tops of the cabinets so that he could have something to screw the crown moulding into. Oh the steps, processes, procedures, blah, blah, blah!
We were finally at the point where I could unpack all of the kitchen boxes that had taken up a home in our garage for the past 8 months. The boys absolutley loved going through the boxes remembering all the things we had. This had to have been the longest time I have gone without my kitchen “stuff”. The first things everyone wanted was homemade cookies of course!
I will say that it was absolutely worth the wait thought there were times when my threats of hiring someone to finish the kitchen were very real. Kevin and I both agree that this was our first and last kitchen remodel. The amount of work and stress definitley takes a toll. The kitchen turned out better than I expected and Kevin, though in his own time, did a great job! There are a few things that we will finish up down the line but for the most part the kitchen itself is now complete and the heart of our home!
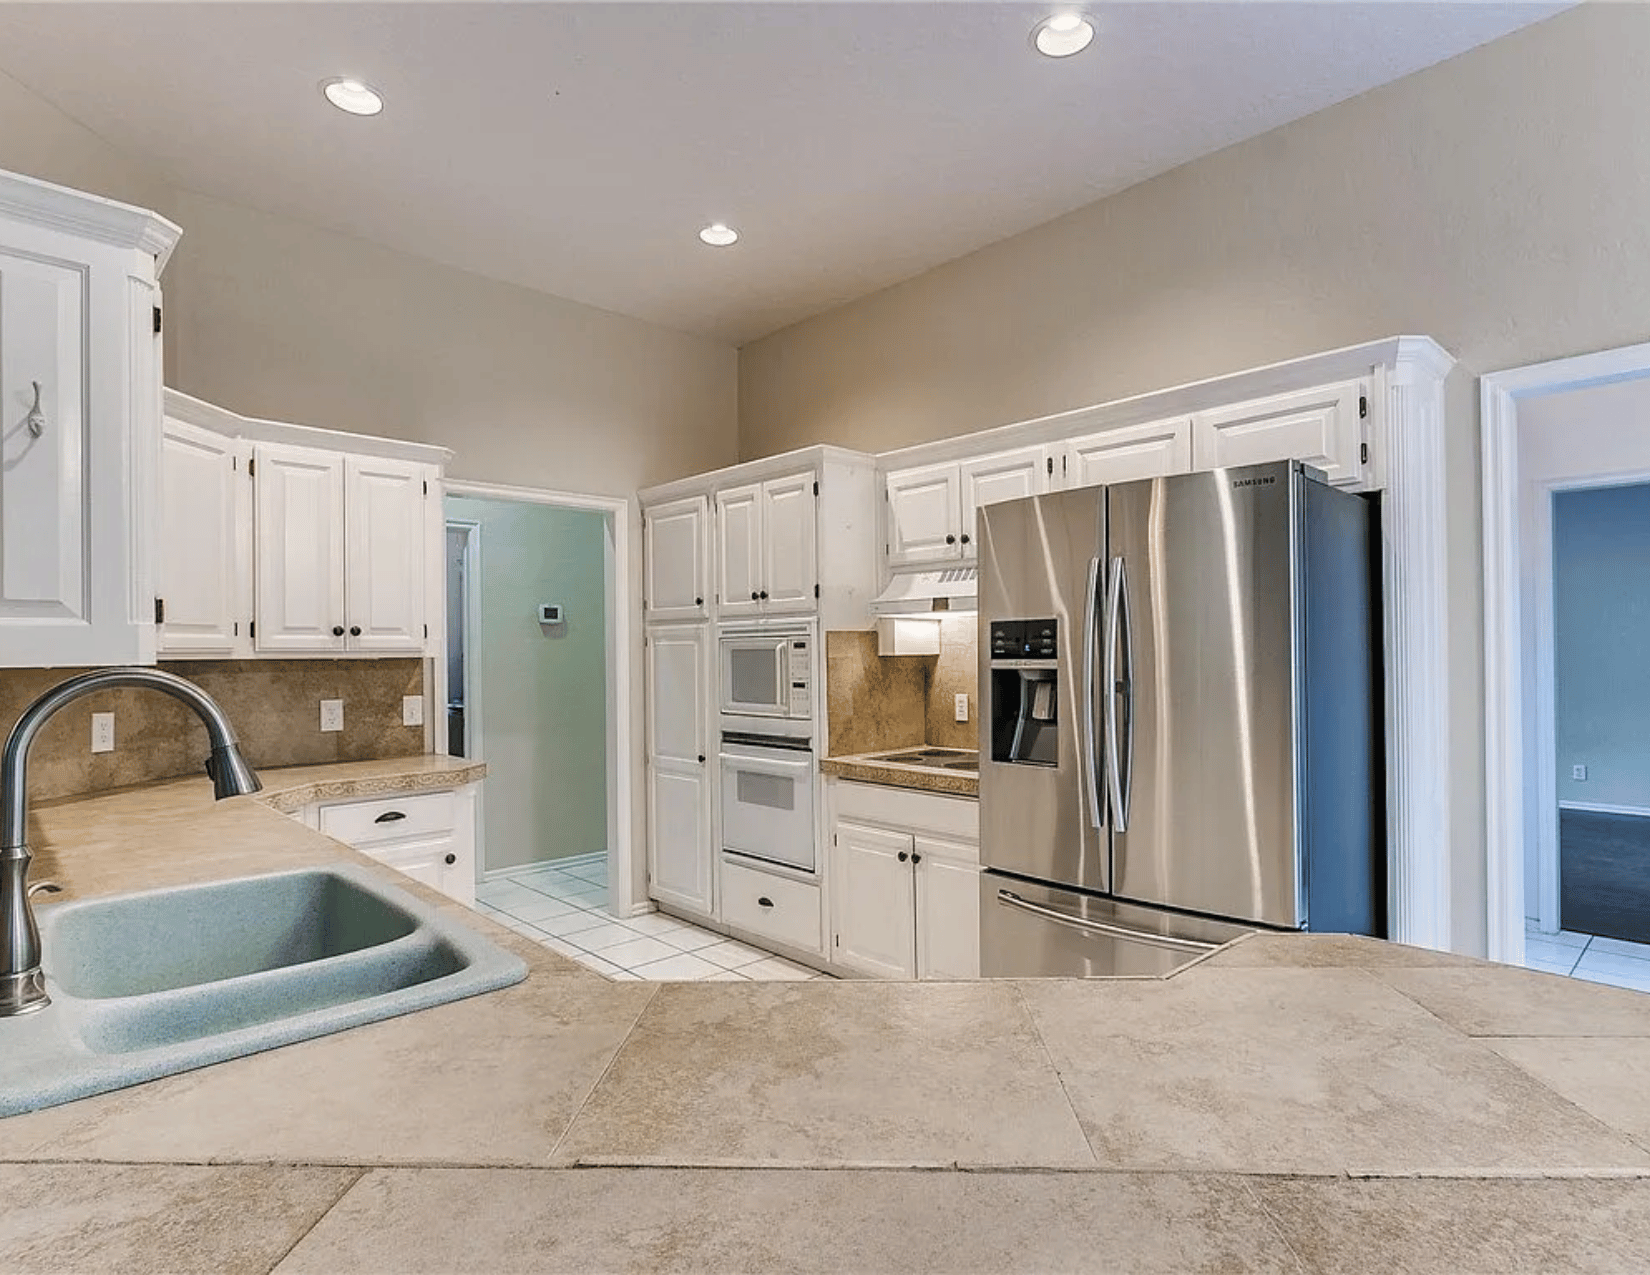
The Completed Kitchen Pitcures


The Before & After